

Adding a User
There are two ways to add users: (1) from active directory or (2) a upload a list users through a preformatted comma delimited file.
Adding users through Active Directory
The first process for providing access to the application follows these broad steps:
- Administrators load up new licenses into the system on the License tab. Each license contains an inherent set of client licenses that are ultimately allocated out to end users in the next steps.
- Once a valid license has been added, administrators proceed to add users into the system via the Users Tab. Before a user can be added into the system, they must already exist in the OS's security framework (either the local users or as a user in the Active Directory).
- On adding a user into the system, administrators must allocate one of the client licenses from the license packs added in step 1 above.
- Once added, users can be delegated administrative rights and assigned roles.
- Once users have been added into the system, they should be preferably added to roles. This will make the allocation of access and security easier to administer. Either set the role as part of the user addition wizard or via the Roles Tab, add a role, and then add users or groups to the role's definition.
- Roles can include users already in the system or they can include security groups from the security framework
- Roles are used to drive access to content (report books and folders) as well as access to data sources (cube servers etc)
- (Optional) After creating a role, go to the Server Tab, and add roles to existing data sources to provide Professional and Analyst user types with direct access to cube servers for ad-hoc analyses.
Adding multiples users at a time
The second process allows you to add multiple users by importing a preformatted file.
1. Administrators should go to the "Users" tab and click on the "import" button (indicated with the red arrow).

2. Click on the “Download Template” button and save the file on your computer.

3. Once the file has been downloaded, the template should be filled out as described below:
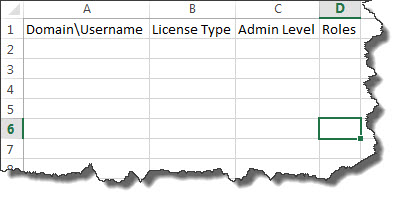
a. Domain\Username –Fill in the domain and user account name; Insert \ as a separator between the two fields.
b. Client License Type – Provide the client license for the user as follows:
| License Type | Number |
|---|---|
| Consumer | 1 |
| Analyst | 2 |
| Professional | 3 |
| Viewer | 4 |
NOTE: The system will provide a free license if available
c. Admin Level– Insert a number as follows:
| Admin Level | Number |
|---|---|
| No Admin | 0 |
| Full Admin | 1 |
| User Admin | 2 |
| System Admin | 3 |
| Data Source Admin | 4 |
d. Roles– Insert the roles that this user will belong to directly. Use a semicolon to separate between roles (For example: Role1;Role2).
4. Then save the file as a comma delimited file.
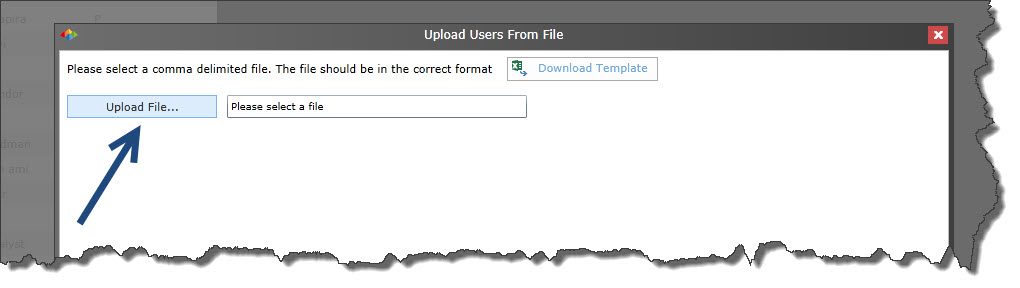
5. Click on the "Upload File" button and browse to the correct file.
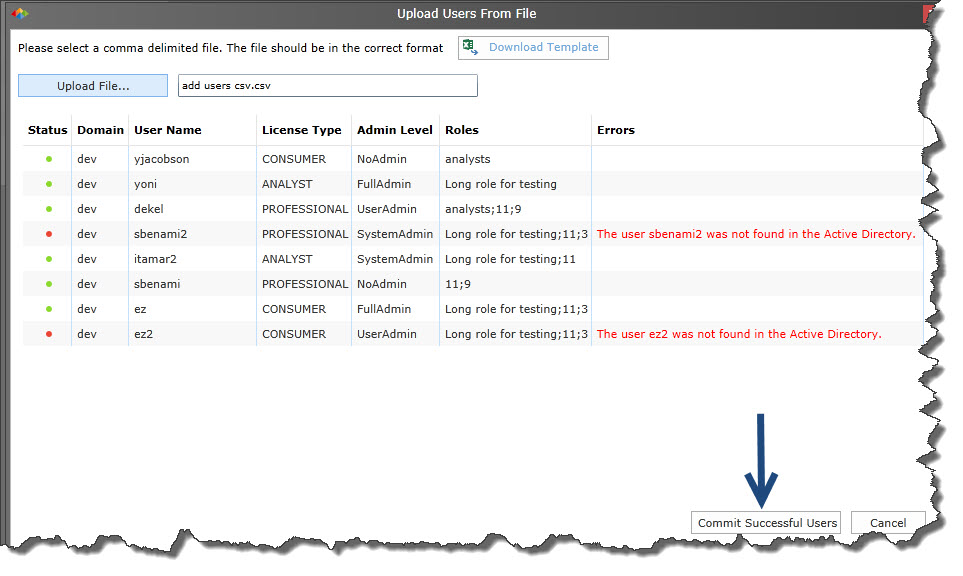
6.The system will process and validate the input. A status for each entry will be displayed
- Green – successful
- Red – failed
7. Click "Commit Successful Users" to add the users.
Home |
Table of Contents |
Index |
User Community
Pyramid Analytics © 2011-2022